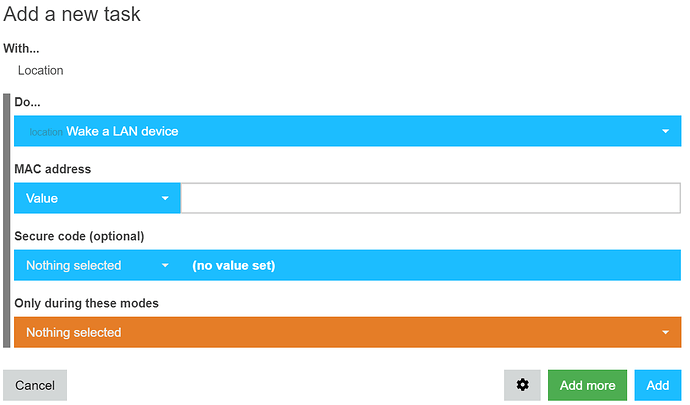
This piston is designed to execute a WakeOnLAN request from Alexa which toggles a virtual switch which in turn executes an HTTP GET request to a Raspberry Pi running a CGI Script. The script issues a WakeOnLAN magic packet request to the target computer. Note that the Raspberry Pi and the target computer must be on the same LAN for this to work.
On your Raspberry Pi, from a command Window:
sudo apt-get update
sudo apt-get install apache2
a2enmod cgi
Add the following to the end of /etc/apach2/apache2.conf
<Directory /var/www/html>
Options +ExecCGI
AddHandler cgi-script .cgi
</Directory>
Restart Apache:
sudo service apache2 restart
Install the “etherwake” package to provide the wakeonlan commnad:
sudo apt-get install etherwake
Create a CGI Script:
sudo nano /var/www/html/wakeupcomputer.cgi
#!/bin/bash
echo “Content-type: text/html”
echo “”
echo “<html><head><title>Wake my Computer on LAN”
echo “</title></head><body>”
echo “<h1>Waking My Computer</h1>”
echo “$(wakeonlan 12:23:34:ab:cd:ef)”
Make the script executable:
chmod 755 /var/www/html/wakeupcomputer.cgi
Note: You will need to go into your computer setup in the BIOS and make sure that Wake on LAN is enabled. In most BIOS this is listed under the Power Management section and it is normally an option for Wake on PCI/PCIe events. Make sure it is enabled.
As a second step, the software needs to honor Wake on LAN.
FOR WINDOWS COMPUTERS:
In Windows you can go into device manager and look at the properties of your network controller. Note whether you are using the wired or the wireless controller. Under “Advanced” there should be a checkbox option to “wake on magic packet”. Make sure that is on.
In addition, you must enter the Power Management section of your LAN controller in windows and check the option to “Allow this device to wake the computer” and “Only allow a magic packet to wake the computer”.
FOR MACOS COMPUTERS:
If you are running MacOS, open the systems Preferences tab from the Apple menu. Select Energy Saver from the System Preferences Window or from the top menu go to View > Energy Saver. Put a check in the box called Wake for Ethernet network access or Wake for Wifi Network Access.
FOR LINUX COMPUTERS:
From a terminal:
sudo apt-get install ethtool
See if your Computer supports Wake on Lan:
sudo ethtool eth0
Look for “Supports Wake on” value. If there is a “g” in there, then Wake On LAN can be enabled. Note that eth0 might not be your ethernet device, in which case you should type “ifconfig” to identify which of your devices is correct. So, you might be entering a device name different than “etho” below.
To turn on Wake On LAN:
sudo ethtool -s eth0 wol g
NOW CONFIGURE THE SCRIPT
In the process of setting Wake On LAN for your target computer you should have taken note of the physical MAC address of the ethernet adapter that you configured for Wake on LAN. In the wakeupcomputer.cgi script above, you will want to change this line to match your MAC address:
echo “$(wakeonlan 12:23:34:ab:cd:ef)”
The next step is to go into the SmartThings IDE and create a virtual Switch to control sending your Wake On LAN request. Be sure to go into the SmartThings classic app on your phone and into the Automation\SmartApps section and add your virtual switch both in the Webcore SmartApp and also into the Alexa SmartAPP. Then tell Alexa to discover the new switch:
Say, “Alexa Discover”
Next we create a WebCore Piston to send the Web Request to the target computer to power up:
Finally, I go into the “Alexa” app and create a group called “my computer” which contains only the virtual device “Computterroom”.
Once this is all completed, you can say:
“Alexa, turn on my computer”
If everything works, your computer should power up magically.
Additional Notes:
Consider statically addressing your Raspberry Pi, so that the address does not change via DHCP. In order to test to see if the Wake on LAN request works, you can issue the following from the command line of the Raspberry Pi with your Mac address:
wakeonlan ab:cd:eg:12:34:56
If this does not work, you may want to revisit your BIOS settings on the target computer and the OS settings as detailed above. If that works, then try the following from your web browser with the address of your Raspberry Pi:
http://172.16.1.4/wakeupcomputer.cgi
If that does not work, check to be sure the address is correct and that the name of your script is correct. Also check to be sure the script is marked executable on the Raspberry Pi with the “chmod” command.

